Learn how to create dice in CSS using flexbox

First Face

Our first-face of the die will have one dot at the center.
<div class="dice first-face">
<span class="dot"> </span>
</div>
Here, we have the dice– and dot-classed elements. Now we can add some CSS to the die.
.dice {
    padding: 4px;
    background-color: tomato;
    width: 104px;
    height: 104px;
    border-radius: 10%;
}
Now, it creates a box like this.

Now, let’s add some style to the dot.
.dot {
display: block;
   width: 24px;
   height: 24px;
   border-radius: 50%;
   background-color:white;
}
This will add a circle inside the dice div. Now, the dice container looks like:
![]()
Now, let’s make the dot container appear on the center of the dice container. For that, we need to make the first-face as flexbox and apply:
justify-content:center → will make the dot align to the center of the main axis (horizontal).
align-items:center → will make the dot align to the center of the cross axis (vertical).
.first-face {
display: flex;
justify-content: center;
align-items: center;
}
Second Face
Now, we need create a die with two dots — one dot at the top-left corner and another at the bottom-right corner.
<div class="dice second-face">
<span class="dot"> </span>
<span class="dot"> </span>
</div>
Make the second face as flex, and add:
justify-content: space-between → This will place the children at the beginning and the end of the flex-container.
.second-face{
display: flex;

   justify-content : space-between;
}
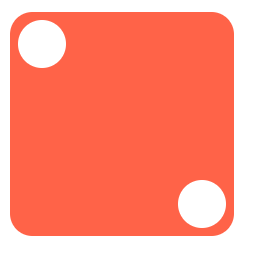
The above code will create a dice like this:

The first dot is in the correct place: the top-left corner. Now, we need to align the second dot to the bottom-right corner. For that, apply the align-self property to the second dot of the die.
align-self: flex-end → will align the item to the end of the flex container.
.second-face .dot:nth-of-type(2) {
align-self: flex-end;
}
Third Face
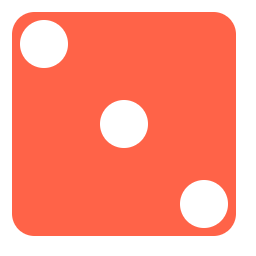
For achieving the third face, we’ll have three dots: one at the top left, one at the center, and one at the bottom right of the die.
<div class="dice third-face">
<span class="dot"></span>
  <span class="dot"></span>
  <span class="dot"></span>
</div>
We can achieve the third-face by placing an another dot center to the second-face.
justify-content: space-between → This will place the children at the beginning and the end of the flex-container.
.second-face{
display: flex;

   justify-content : space-between;
}
Now, we need to make the last dot (third dot) that’ll be placed in the bottom-right.
.second-face .dot:nth-of-type(3) {
align-self: flex-end;
}
Align the middle dot (second dot) at the center of the parent.
.second-face .dot:nth-of-type(2) {
align-self: center;
}
If we want the first dot in the top-right and the last dot in the bottom-left, then change the first dot’s align-self to flex-end — automatically the third dot will be placed to the bottom-left because the default property of align-self is flex-start.
.third-face .dot:nth-of-type(1) {
align-self :flex-end;
}
.third-face .dot:nth-of-type(2) {
align-self :center;
}
Fourth Face
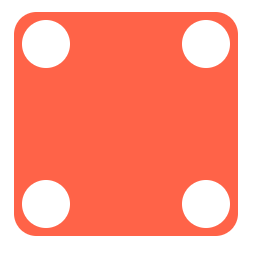
In our fourth face, we can split it in two rows, each row containing two columns. One row will be at flex-start, and another will be at flex-end .
<div class="fourth-face dice">
<div class="column">
    <span class="dot"></span>
    <span class="dot"></span>
  </div>
<div class="column">
    <span class="dot"></span>
    <span class="dot"></span>
  </div>
</div>
The above code will create a die like this:

Now apply display: flex.
.fourth-face {
display: flex;
}

Add the justify-content property space-between so it’ll be placed at the left and right of the die.

Now, we need to make the dots in the column elements at top and bottom. For that:
- Set
columntoflex - Apply
flex-directionascolumnso thedotsare placed in the column axis - Add
justify-contentasspace-between— it’ll make the first dot at top and second dot at bottom.
.fourth-face .column {
display: flex;
  flex-direction: column;
  justify-content: space-between;
}
Sixth Face

From the fourth face, we can achieve the sixth face by adding a one-dot div to each column.
<div class="fourth-face dice">
<div class="column">
    <span class="dot"></span>
    <span class="dot"></span>
    <span class="dot"></span>
  </div>
<div class="column">
    <span class="dot"></span>
    <span class="dot"></span>
    <span class="dot"></span>
 </div>
</div>
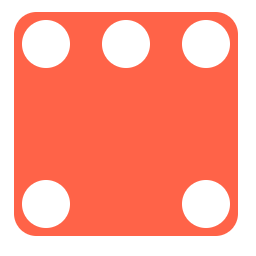
Fifth Face

We can again create fifth-face from the fourth face by adding another column with one dot and placing the dot (justify-content) at the center.
<div class="fifth-face dice">

  <div class="column">
    <span class="dot"></span>
    <span class="dot"></span>
  </div>

<div class="column">
    <span class="dot"></span>
  </div>

  <div class="column">
    <span class="dot"></span>
    <span class="dot"></span>
  </div>
</div>
Apply all of the properties applied to .fourth-face and .fourth-face .column to .fifth-face and .fifth-face .column. That’ll create a die like this:
Now, we need to align the second dot to the center in a vertical direction. For that, we can apply justify-content as center to the column.
.fifth-face .column:nth-of-type(2) {
justify-content: center;
}
That’ll make the die look like a five-face die.
Thanks for reading. Hope you like this.
