Five Ways to Loop Through a JavaScript Array

Learn the different methods to loop through arrays in JavaScript

Photo by Zan on Unsplash

https://gitconnected.com/portfolio-api

In JavaScript there are many ways to loop through Array.

  1. Loops which can break or skip (continue) an iteration:
  • for
  • while
  • do…while
  • for…in

2. Loops which we cannot break or skip an iteration:

  • forEach

Tip: To create an array with a number elements

var array = Array.from(new Array(10000).keys()); 
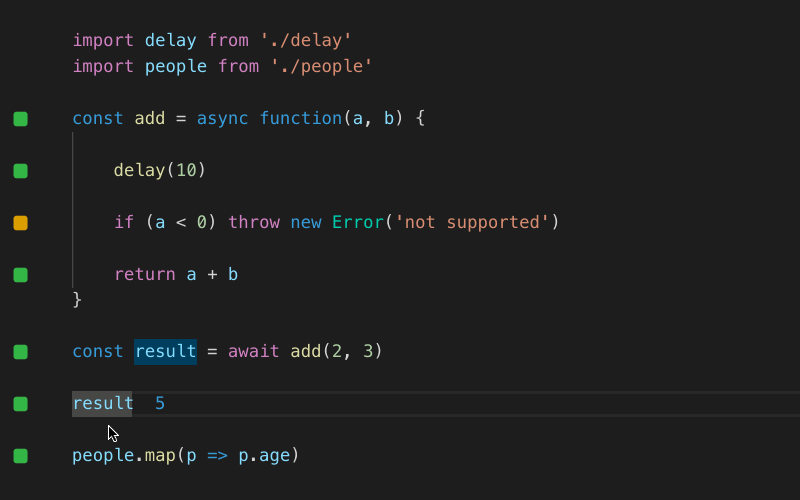
1. for

let arrayLength = array.length;
for(let i = 0 ; i < arrayLength; i++) {

let val = array[i];
}
  • We can break the loop using the break statement
  • We can skip the current iteration using continue statement.

2. while

let i = 0;
let arrayLength = array.length;
while(i < arrayLength ) {
   let val = array[i];
   i++;
}

We can also use break and continue in a while loop. But when we are using a while loop we need to take care of the increment for the next iteration. If we forgot the increment part, then it may result in an infinite loop.


3. do…while

I don’t prefer using do…while loop for iterating an array. A do…while will always perform an action once before checking for the condition, meaning it will execute even if our array is empty. This means it should only be used for specific cases.

let i = 0;
let arrayLength = array.length;
do {
  let val = array[i];
  i++;  
} while (i < arrayLength);

We can also use break and continue in a do…while loop.


4. for…in

for (let val in array) {
// operation
}

We can use break and continue in a for…in loop. These loops can also be used to iterate through objects.


5. forEach

We use the forEach if we need to execute an operation on every element of the array. We cannot break or skip iteration in this loop. Using a forEach is also a more functional and declarative syntax which makes it the preferred choice by many developers.

array.forEach(val => {
 // operation
});

There is a benchmark test written to find the time difference between these different functions here: https://jsperf.com/for-vs-foreach/654. The basic for loop is actually the fastest in the test cases.

In addition to the above methods, we can also use map, filter, and reduce which are more advanced JavaScript functions. These are used for specific cases that you can learn about in the article below:

https://gitconnected.com/portfolio-api

Follow Javascript Jeep🚙💨.

https://gitconnected.com/portfolio-api

Different ways to measure performance in JavaScript

Learn different ways to measure the time it takes to execute programs in JavaScript

Image by Aron Visuals

To find how much time a function, loop, or any operation takes to execute in JavaScript, we can use one of the following tools:

  • Using console.time and console.timeEnd
  • Using the performance.now method
  • Using online performance testing tools

1. Using console.time and console.timeEnd

The console.time and console.timeEnd will print the number of millisecond taken to execute the code between the function calls.

function test() {
for(let i =0 ; i < 100000; i++) {
//operation;
}
}
console.time();
test();
console.timeEnd();
// This will produce 
default: 1.2529296875ms (time taken to execute test function, value may vary ).

We can also use labels to tag different timing operations.

console.time("test");
test();
console.timeEnd("test");
// test: 1.117919921875ms

We can use nested console.time with different label

console.time("test1");
   test();
   console.time("test2");
test();
console.timeEnd("test2");
console.timeEnd("test1");
test2: 0.875ms
test1: 2.1748046875ms

You can write a method which will automatically handle Logging perfomance

function runTest(fn, n = 1){
    console.time("Test");
    for(let i =0 ; i < n; i++) {
        fn();
     }
     console.timeEnd("Test");
}
// we can pass the function and number of iteration . 

For comparing two functions

function compareFunction(fn1, fn2, n = 1) {
  console.time("Fn1");
  for(let i =0 ; i < n; i++) {
     fn1();
  }
  console.timeEnd("Fn1");
  console.time("Fn2");
  for(let i =0 ; i < n; i++) {
      fn2();
  }
   console.timeEnd("Fn2"); 
}
// we can pass the function and number of iteration .

2. Using performance.now()

The performance.now() method will return a timestamp in milliseconds of how long it’s been since you loaded the page.

Let’s try to print the value once the window is loaded.

window.onload = function (ev) {
   console.log(performance.now()); // the value will be around 100ms
}

Let’s use that to check the performance:

var start = performance.now();
test();
var end = performance.now();
var timeTaken = end - start; // 1.1350000277161598

But Mozilla says

The timestamp is not actually high-resolution. To mitigate security threats such as Spectre, browsers currently round the results to varying degrees. (Firefox started rounding to 1 millisecond in Firefox 60). Some browsers may also slightly randomise the timestamp. The precision may improve again in future releases; browser developers are still investigating these timing attacks and how best to mitigate them.

Online Testing Tools

Online performance testing tools will execute our JavaScript code, run benchmarks, and give us the performance result. Three of the best online testing tools are:

  1. jsPerf
  2. jsBen.CH
  3. jsBench.me

Join your hand 🤚 with me JavaScript Jeep🚙💨 .

Buy me a coffee.

Buy me a coffee.

Understanding The forEach Method for Arrays in JavaScript

Improve your iteration

Photo by Mika Baumeister on Unsplash

What is forEach?

The forEach method executes the callback function against all element of the array.

forEach method in JavaScript

Syntax

array.forEach(callbackFunction, [, thisArg]);
// thisArg is optional
arguments for callbackFunction
callbackFunction(currentValue, index ,array) {
   //index, array is optional
}

The forEach method doesn’t return anything.

Let’s start basic with a loop, then convert that into a forEach loop

var array = [1,2,3,4,5];
function print(val, index) {
    console.log(`array[${index}] = ${val}`);
}
for(let index =0, len = array.length; index < len; index++ ) {
       let val = array[index];
print(index, val);
}

Now, let’s do the same operation using a forEach loop.

var array = [1,2,3,4,5];
function print(val, index) {
   console.log(`array[${index}] = ${val}`);
}
array.forEach(print);
// output
array[0] = 1
array[1] = 2
array[2] = 3
array[3] = 4
array[4] = 5

We can’t use break or continue inside forEach. If you want to break or continue the loop in the middle, you can use:

  • A for loop
  • every
  • some

The forEach loop doesn’t execute for the empty values

Example 1:

var arr = new Array(3);
arr; // [empty × 3]
arr.forEach( val  => console.log(val) ); // it prints nothing

Example 2:

var arr = [1,,,,];
arr.forEach( val  => console.log(val) ); 
//output : 1
// it prints 1 then forEach loop will be terminated

Example 3:

var arr = [1,,null, undefined, NaN]
arr.forEach( val  => console.log(val) );
output:
1
null
undefined
NaN

If the array is modified during iteration, other elements might be skipped

var array = [1,2,3,4,5];
array.forEach((value, index, sourceArray) => {

sourceArray.push(10);
console.log(value);
})
output : 
1,2,3,4,5
array : [1,2,3,4,5,10,10,10,10,10]

In the above example, we added an element on each iteration. But the for-each loop will only be executed for elements and is available in the array during the start of the forEach operation.

Deleting array elements during forEach

If an unvisited element of the array is deleted during the forEach loop, then the elements are skipped .

var array = [1,2,3,4,5];
array.forEach((value, index, sourceArray) => {

sourceArray.pop();
console.log(value);
});
output:
1, 2, 3
array:[1,2]

In the above example, we deleted the last element on each iteration. The deleted elements aren’t printed. Her,e only the unvisited elements are skipped. That’s why 3 is printed in the output but deleted in the source array.


Don’t Delete or Add Elements

We shouldn’t use forEach for the modification of elements inside a forEach callback function. It violates the forEach pattern.

Remember forEach is used to execute a function against all elements of the array.


Using the ‘this’ Arg

We can also specify our custom this value when executing a forEach loop.

Example 1 (without passing this):

var array = [1];
function log(val, index) {
console.log(this); // window object
}
array.forEach(log);
In the above code this --> window

Example 2:

var customThis = {val : 10};
var array = [1];
function log(val, index) {
console.log(this.val); // 10
}
array.forEach(log, customThis);

References

15 VS Code Extensions to Save Your Time and Make You a Better Developer

A list of useful VS Code extensions for frontend developers


https://gitconnected.com/portfolio-api

VS Code has a marketplace, and it contains a collection of plugins that can be installed into the text editor to make it more powerful. We can open market place by selecting Extension option in View menu or simply press shift + cmd + X .

The below list of extensions can be installed in VS Code to save your time in multiple ways and make you a better developer.

1. Live Server

This allows us to automatically reload the web page when you change the code in your IDE.

https://gitconnected.com/portfolio-api

Live server

Once Live Server is installed, you can right-click on an html file and you can see an option Open with Live Server[Alt + L + Q].

2. Quokka.js

Quokka.js will automatically compute the result you are typing and print the result in the IDE itself.

https://gitconnected.com/portfolio-api

Quokka

3. Code Spell Checker

This spell checker will report some common spelling errors. This works well with camelCase code.

https://gitconnected.com/portfolio-api

Spell checker

4. GitLens

GitLens supercharges the Git capabilities built into Visual Studio Code. It helps you to visualize code authorship at a glance via Git blame annotations. It seamlessly navigates and explores Git repositories, gaining valuable insights via powerful comparison commands, and so much more.

https://gitconnected.com/portfolio-api

Git lens

5. Prettier (Code Formatter)

Prettier is an opinionated code formatter. It enforces a consistent style by parsing your code and re-printing it with its own rules. This is an essential tool that allows you to achieve correctly formatted code without any effort from developers. Prettier comes with sensible defaults, but you can also provide a configuration file at the root of the project to set your own standards, such as line length, number of tabs/spaces, and much more. Link to install

https://gitconnected.com/portfolio-api

Prettier

6.ESLint

ESLint is a static code analysis tool for identifying problematic patterns found in JavaScript code. Rules in ESLint are configurable, and customized rules can be defined and loaded. ESLint covers both code quality and coding style issues.

https://gitconnected.com/portfolio-api


7. vscode-icons

This will provide icons next to file names in the tree view based on the file extension. This makes it much easier to identify your files at a glance.

https://gitconnected.com/portfolio-api

VScode icons

8. Live Saas Compiler

This is a VS Code extension that helps you to compile/transpile your SASS/SCSS files to CSS files in real time with a live browser reload.

https://gitconnected.com/portfolio-api

Live saas compiler

9. JavaScript (ES6) code snippets

This extension contains code snippets for JavaScript in ES6 syntax for the VS Code editor (supports both JavaScript and TypeScript).

https://gitconnected.com/portfolio-api

10. Browser Preview

Browser Preview for VS Code enables you to open a real browser preview inside your editor that you can debug with.

https://gitconnected.com/portfolio-api

Browser preview.

11. Path Intellisense

This will autocomplete path and file names in your code.

https://gitconnected.com/portfolio-api

Path Intellisense

12.Bracket Pair Colorizer

This extension allows matching brackets to be identified with colors. The user can define which characters to match and which colors to use.

https://gitconnected.com/portfolio-api

Bracket color

13. Vim

VSCodeVim is a Vim emulator for Visual Studio Code, bringing the power of Vim to your text editor. Link to install

https://gitconnected.com/portfolio-api


14. TODO Highlight

Highlight TODO, FIXME, and other annotations within your code.

https://gitconnected.com/portfolio-api

To do highlighter

15. Color Highlight

This extension styles css/web colors found in your document so you can see what color they are without needing to open the page.

https://gitconnected.com/portfolio-api

Follow Javascript Jeep🚙💨

https://gitconnected.com/portfolio-api

Three ways to merge arrays in JavaScript

Learn different ways to merge array in JavaScript

Image by Makarios Tang

1. Using for loop

We can loop through the array source array which need to be pushed , then add elements one by one

function push(fromArray, toArray) {
     for(let i = 0, len = fromArray.length; i < len; i++) {
toArray.push(fromArray[i]);
}
      return toArray;
}

var array1 = [1,2,3,4,5];
var array2= [6,7,8,9,10];
var array3 = [];
push(array1, array3);
push(array2, array3);

2. Using spread operator

Spread syntax allows an iterable such as an array expression or string to be expanded in places where zero or more arguments (for function calls) or elements (for array literals) are expected

var array1 = [1,2,3,4,5];
var array2 = [6,7,8,9,10];
var array3 = [...array1, ...array2];
array3; // [1,2,3,4,5,6,7,8,9,10];

We can use spread operator with push

var array1 = [1,2,3,4,5];
var array2 = [6,7,8,9,10];
var array3 = []
array3.push(...array1, ...array2);
array3; //  [1, 2, 3, 4, 5, 6, 7, 8, 9, 10]

We can also use spread operator with Array.of

var array1 = [1,2,3,4,5]
var array2 = [6,7,8,9,10];
var array3 = Array.of(...array2, ...array1);

We can use spread operator to convert string to array

var string ="two";
var arrayOfChar = [...string];
arrayOfChar; //["t", "w", "o"]

3. Using concat method

The concat() method is used to merge two or more arrays. This method does not change the existing arrays, but instead returns a new array.

var array1 = [1,2,3,4,5]
var array2 = [6,7,8,9,10];

var array3 = array1.concat(array2);
// or
var array3 = [].concat(array1, array2);

We can pass other than array as arguments.

var a = "string";
var b = 1;
var c = {};
var combined = [].concat(a, b, c)
combined; //  ["string", 1, {…}]

4. Using Reduce method

The reduce() method executes a reducer function (that you provide) on each element of the array, resulting in a single output value.

var array1 = [1,2,3,4,5];
var array2 = [6,7,8,9,10];
var array3 = array2.reduce((newArray, item) => {
          newArray.push(item);
return newArray;
 ), array1);

How to Install Themes in Chrome Dev Tools — Make the Chrome Console Colorful

This article shows you how to add themes in your Chrome developer console and make it look like your favorite IDE or text editor


To make your Chrome dev tool look like your IDE, you need to:

  • Enable the experiment flag Allow custom UI themes in your Chrome.
  • Install a UI Extension (Material Theme) from the Chrome store.

Open the Chrome console using cmd + option + J

Go to the settings (ShortCut → F1)

navigate to settings

In the Settings > Preferences tab, select the theme as dark. Now your developer tool will turn into dark mode. If you want to install a custom theme, you need to enable an experiment flag named Developer Tools experiments.

Install Material Dev Tools extension from the Chrome store.

Once the above extension is installed, again go to Settings. In settings under the Experiments tab, select Allow custom UI themes.


Once it is enabled, now close and re-open the dev tools. That’s it!

After installing UI theme

You can change the color and theme by selecting “theme” in the available options in the Material Dev Tools extension.

https://levelup.gitconnected.com/console-cheat-sheet-for-javascript-developers-21f0c49604d4

Sponsor me a coffee ☕️ .

You Don’t Need Loops in JavaScript

Learn how to remove loops and use higher-order functions like map, reduce, and filter

Image by Lysander Yuen

Why Are We Replacing Loops?

Using higher-order functions will make your code :

  • More readable.
  • Easy to understand.
  • Easy to debug.

1. To Loop Through All Elements and Get an new modified array

Using loop:

var names = ["Jack", "Jecci", "Ram", "Tom"];
var upperCaseNames = [];
for(let i=0, totalNames = names.length; i< totalNames ; i= i +1) {
upperCaseNames = names[i].toUpperCase();
}

Without loop:

var names = ["Jack", "Jecci", "Ram", "Tom"];
var upperCaseNames = names.map(name => name.toUpperCase());

Note: If you’re using map, you cannot break or continue or return while looping. For this case, you should use every or some. Read about every and some in this article.


2. Loop through all elements and perform an action

Using loops

function print(name) {
console.log(name);
}
var names = ["Jack", "Jecci", "Ram", "Tom"];
for(let i=0, totalNames = names.length; i< totalNames ; i= i +1) {
print(names[i])
}

without loop

var names = ["Jack", "Jecci", "Ram", "Tom"];
names.forEach(name=> print(name));

3. Filtering Array

Using normal for loop:

function isOdd(n) {
return n %2;
}
var numbers = [1,2,3,4,5];
var odd = [];
for(let i=0, total = numbers.length; i< total ; i= i +1) {
   let number = numbers[i];
if( isOdd(number) ) {
odd.push(number);
}
}

Using filter:

var numbers = [1,2,3,4,5, 6, 7]
var odd = numbers.filter(n => n%2); // single line

4. Creating an Output With Array Elements

Sum of numbers:

var numbers = [1,2,3,4,5]
var result = 0;
for(let i=0, total = numbers.length; i< total ; i= i +1) {
   result = result + numbers[i];
}

Using reduce:

var numbers = [1,2,3,4,5,6,7];
function sum(accumulator, currentValue){
return accumulator + currentValue;
}
var initialVal = 0;
var result = numbers.reduce(sum, initialVal);

The above code can be even more simplified:

var numbers = [1,2,3,4,5,6,7, 10];
var result = numbers.reduce((acc, val)=> acc+val, 0);

5. Checking if an Array Contains a Value

var names = ["ram", "raj", "rahul"];
for(let i=0, totalNames = names.length; i< totalNames ; i= i +1) {
if(names[i] === "rahul") {
console.log("%c found rahul", "color:red");
return;
}
}

Using some:

var names = ["ram", "raj", "rahul"];
let isRahulPresent = names.some(name => name==="rahul");
if(isRahulPresent) {
console.log("%c found rahul", "color:red");
}

%c in the console statement will apply style to the console text. You can learn more about that in this article.


5. To Check Whether Every Element in an Array Meets a Condition

Using for loop:

var num = [1,2,3,4,5, 0];
for(let i=0, total = numbers.length; i< total ; i= i +1) {
    if(num <= 0) {
      break;
console.log("0 present in array");
}
}

Using every:

var num = [1,2,3,4,5, 0];
var isZeroFree = num.every(e => e > 0);
if(!isZeroFree) {
console.log("0 present in array");
}

Thanks for reading. I hope you like this.

Generating Random Numbers in JavaScript

It’s more than Math.random()

Image by NeONBRAND

The Math.random() will generate a pseudo-random floating number (a number with decimals) between 0 (inclusive) and 1 (exclusive).

Here, the random number doesn’t mean that you always get a unique number. It generates the same number only after some interval. The interval here is very long, so you probably won’t get the same number twice.

To generate a random number, we can use:

Math.random(); //0.6140915758927235 may be  you get different value

Defining our own random number function:

function rand(maxLimit = 100) {
   return Math.random() * maxLimit;
}   
rand(10); // 5.500949568251157

To get whole numbers, we can use:

  • Math.floor() → to round down
  • Math.ceil() → to round up
  • Math.round() → to nearest number
// using Math.floor
function rand(maxLimit = 100) {
 let rand = Math.random() * maxLimit;
 return Math.floor(rand);
}
// the above code generates any numbers between 0 to maxLimit-1

To get a random number between two numbers (min included, max excluded):

function rand(min, max) {
  let randomNum = Math.random() * (max - min) + min;
  return Math.floor(randomNum);
}
rand(10, 20);

In the above code, (max-min) + min is just to handle if there is any case when the max is less than the min. In such a case, where max is less than min:

max = 5, min = 10
(max - min) + min  => (5 - 10) + 5  => -5  + 5 => 0

To get random numbers including min and max element, we can change Math.floor to Math.round :

function rand(min, max) {
   let randomNum = Math.random() * (max - min) + min;
   return Math.round(randomNum);
}
rand(10, 20);

Generating Random Hex Colours

We know that hex colours have 1–9 and a-f .

To generate random colours:

  • Store hex values on array
  • Use math.rand to get index
  • Create a color string of length six or three.

https://gist.github.com/Jagathishrex/13a7dab8cff2e9e904b5948bd1eaa35b#file-random_color-js

Thanks for reading!

Detecting Battery Status in JavaScript.

Learn how to detect battery status in JavaScript using Battery Manager.

Image by Brett Jordan.

The BatteryManager interface provides ways to get information about the system’s battery charge level.

We can use the Battery Manager to detect

  • charging state
  • Battery percentage
  • Time needed to charge 100%
  • The remaining time until the battery is completely discharged.

First, let’s check if the browser supports battery 🔋

let isBatterySupported = 'getBattery' in navigator;
if(!isBatterySupported) {
console.log("Battery not supported");
}

Once our browser supports the BatteryManager, we can get that from getBattery method in navigator object, which will return a promise once the promise is resolved we will get the BatteryManager object, which has four properties and four events

Properties

charging - Determines the charging state (true/false)
level - Battery Percentage
chargingTime -  the remaining time in seconds until the battery is fully charged, or 0 if the battery is already fully charged.
dischargingTime -  the remaining time in seconds until the battery is completely discharged and the system will suspend.

Events

onchargingchange - triggered when charging state changed
onlevelchange - triggered when level of battery changed
onchargingtimechange - This event is sent when the battery charging time is updated
ondischargingtimechange - This event is sent when the battery charging time is updated

Let’s get the Battery object

let batteryPromise = navigator.getBattery();
batteryPromise.then(batteryCallback);

function batteryCallback(batteryObject) {
   printBatteryStatus(batteryObject);
}
function printBatteryStatus(batteryObject) {
    console.log("IsCharging", batteryObject.charging);
    console.log("Percentage", batteryObject.level);

console.log("charging Time", batteryObject.chargingTime);
    console.log("DisCharging Time", batteryObject.dischargingTime);
}

Result for above code

Note

The value of discharging time is Infinity. if the battery is currently charging rather than discharging, or if the system is unable to report the remaining discharging time.

Adding Events

Now let’s add event to detect charge level change and charge state change in our battery callback function

function batteryCallback(batteryObject) {
    printBatteryStatus(batteryObject);
    batteryObject.addEventListener('chargingchange', function(ev
{
printBatteryStatus(batteryObject);
});
batteryObject.addEventListener('levelchange', function(ev
{
printBatteryStatus(batteryObject);
});
}

The above event will be triggered once the level of charge changes or charging state changes.

Reference

MDN: BatteryManager.

Debug Like a Lion With Chrome’s DevTools

Tips and tricks for using Chrome’s DevTools more effectively

Image by Ivan Diaz

You can open Chrome’s DevTools with CMD + option + J.

Note: This tricks only works in the Chrome console.


1. $_

If you type $_ in the console, it will print the last evaluated expression in the console.

Example:

6 + 6 // 12
$_ // 12

We can also perform an operation on $_:

$_ * 5 // 60
$_ // 60

The $_ will contain the value of what the expression returns. If the expression returns $_ it is undefined.

// try in your console
var a = {} // undefined
$_ // undefined
// Similarly
function a () {} ;
$_ undefined

$_ can be any value (number/object/anything).

window
Window {parent: Window, postMessage: ƒ, blur: ƒ, focus: ƒ, close: ƒ, …}
$_
Window {parent: Window, postMessage: ƒ, blur: ƒ, focus: ƒ, close: ƒ, …}

2. monitor(function)

When we call the monitor function with any function reference, then whenever the function is called, the function name with arguments passed will be printed in the console.


Use unmonitor(function) to stop monitoring.


3. copy(Object)

Copies the object as a String to the clipboard.

var a = {
name : 10
}
copy(a);

4. clear() — Clears Console

Clears the browser console.

We can also clear the console history by right-clicking in the console. There we will have two options, one to clear console and another to clear console history.


5. $0 — $4 — Selected Element History

This will have the reference to the last five selected DOM elements from the elements tab of the developer tool. If none of the elements are selected then it returns undefined.

  • $0 → returns the last selected element.
  • $1 → returns the second-last selected one, and so on.

6. $(selector, [startNode])

We can use $(selector ) instead of debugging using document.querySelector in the console.

$(‘img’) -- will return the first img tag.

The startNode specifies an element or Node from which to search for elements. The default value of this parameter is document.


7. $$(selector, [startNode])

This is an alternative for document.querySelectorAll in the console

$$(‘img’) → will return all image elements

8. debug(function) — Automatic Debug Mode

If we want to automatically stop the debugger at a specific function, then we pass the function name to the debug function.

function test() {
console.log("testing");
}
debug(test)

Use undebug to stop automatic debug mode.


9. inspect(function/DOM)

This will take either the DOM element or a function based on the argument passed.

Passing a function name.

function test() {
console.log("testing");
}
inspect(test); // take you to function definition

Passing a DOM element.

inspect(document.body)

10. keys(object)

This will print the keys of the object passed. Alternative to Object.keys.

var a = {
one : 1,
two : 2
}
keys(a)
// (2) ["one", "two"]

11. values(object)

This will print the keys of the object passed. Alternative to Object.value.

var a = {
one : 1,
two : 2
}
values(a)
// (2) [1,2]

12. monitorEvents(element, [eventNames])

When one of the specified events occurs on the specified object, the Event object is logged to the console. You can specify a single event to monitor or an array of events:

monitorEvents(btn, 'click');

Whenever a button is clicked, the event object will be printed in the console.

monitorEvents(input, ['keypress', 'input', 'keydown'])

You can also specify one of the available event “types”, strings that map to predefined sets of events. The table below lists the available event types and their associated event mappings:


monitorEvents(input, "key");

Use unmonitorEvents to stop monitoring.


13. getEventListeners(element)

Returns events registered to a specific DOM element.


14. table(data) — Print As Table

Prints the object in table format.


Design a site like this with WordPress.com
Get started